
|
Can I burn a Spotify playlist to CD and then I can listen to them in my car? If yes, how can I do that? Any advice is appreciated! Thanks. — Joy from Quora As you may know, Spotify music is protected by a special copyright technology and encoded in a special OGG format. By doing so, users are not allowed to use the Spotify tracks outside Spotify app, let alone burning Spotify music to a CD, extract MP3 from Spotify, etc. If you really love a song, a playlist, or an album, you may be wondering like Joy. Yes, as long as you have a powerful third-party Spotify music downloader, you can still burn Spotify playlist to CD. Here in the following, I’ll show you how to do that with ease. 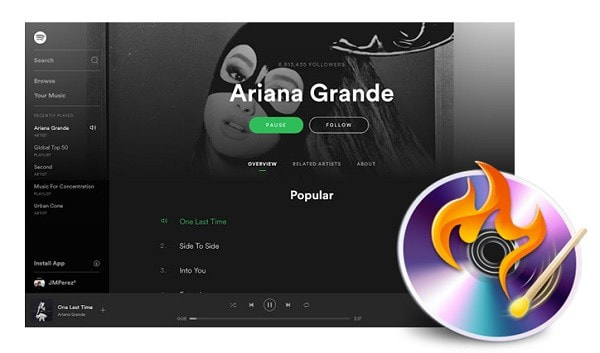 1. Best Spotify Music Converter You’ll NeedCurrently, most of the Spotify tools that claim to remove format limitations from Spotify music are using audio recording technology, which will result in bad quality of the songs. If you are looking for a lossless solution to download and convert Spotify songs to CD burner compatible formats, you are recommended with TunesKit Music Converter for Spotify. TunesKit Spotify Music Converter is the fastest and lossless Spotify format conversion solution specially developed to download any Spotify content, including tracks, albums, playlists, and artists, and convert Spotify content to common MP3, AAC, or other audios that are supported by most CD burning software at 5× faster speed. 2. Tutorial to Burn Spotify Music to CDWith TunesKit Spotify Music Converter for Windows, you can freely burn any Spotify music and playlist to CDs, stream Spotify tracks on any MP3 player, play Spotify in the car. Now read on the following content to find out the complete tutorial on how to burn Spotify to CD with the help of TunesKit.
Now follow the steps and we’ll begin to download music from Spotify by using TunesKit Music Converter for Spotify. Step 1. Load Spotify songs into TunesKit First of all, you need to install TunesKit Spotify Music Converter and Spotify on your PC or Mac at the same time. Then fire up TunesKit on your computer and it will load the Spotify application automatically. Next, locate to the playlist you want to save and add the Spotify playlist to the interface of TunesKit by drag-and-drop. Step 2. Set the output audio parameters If you have successfully uploaded the playlist to TunesKit, you could choose to set the output audio parameter. There are some audio formats like MP3, AAC, FLAC, M4A, and M4B for you to select. Besides, you could also set the bit rate, sample rate, and channel for all output Spotify music songs for better audio effects. Step 3. Download Spotify songs to MP3 If you have configured all audio parameters, you could click on the ‘Convert’ button to download all your added Spotify music. Just wait for a moment and TunesKit will move Spotify music to your computer. You can click the ‘file’ icon to locate the destination folder on your computer and check all converted music files. After you complete the conversion of Spotify music, you could burn Spotify playlists to CD with Windows Media Player, iTunes, or VLC Media Player for free.
0 Comments
iMovie is a famous free video editor for Apple users. Many people are wondering how to add music from Spotify to iMovie for editing as background music. If you're one of them, you can read this post which will introduce an easy-to-use yet powerful tool to help you achieve that, along with detailed step-by-step instructions.  The tool required: TunesKit Spotify Music ConverterBefore going further, first let's take a second to think about why we cannot use Spotify in iMovie directly. This is because all Spotify songs are encoded in OGG Vorbis format with DRM protection. Thus, Spotify music cannot play outside of the Spotify app even if the songs are downloaded. If you want to import tracks from Spotify to iMovie, you'll need to remove the DRM and convert Spotify OGG songs to iMovie compatible formats like MP3 by using a 3rd-party Spotify music converter. TunesKit Spotify Music Converter is such an easy-to-use Spotify music downloader and converter which can quickly and losslessly download any Spotify song/playlist/album and convert Spotify songs to MP3, AAC, WAV or M4A that are supported by iMovie. It's able to keep the original metadata info and ID3 tags as well, such as artwork, artist, album, etc. How to import Spotify music to iMovie as BGM1. Convert Spotify to MP3 with TunesKit
First, you need to convert the Spotify songs to MP3 with TunesKit Spotify Converter. Here are the complete steps you should follow: Step 1. Launch TunesKit Spotify Music Converter on your Mac or Windows, then wait till the Spotify app is completely loaded. Browse the Spotify store to find the songs you want to add into iMovie and then directly drag the URLs into TunesKit. Step 2. Move to the menu bar and select 'Preferences'. Then click 'Convert' panel and select the output format, channel, sample rate, bit rate and more. To make the Spotify songs editable with iMovie, you are highly suggested to set the output format as MP3. Step 3. Click 'Convert' button to start removing DRM from Spotify tracks and converting the audios to MP3 or other iMovie supported formats. After conversion, click on 'history' icon to locate the DRM-free songs. 2. Add DRM-free Spotify Songs to iMovie on Mac Now you get all these DRM-free Spotify songs in MP3 format and you're able to put them to iMovie as background music on your Mac easily. The following are quick steps: Step 1. Open iMovie on the Mac computer and select Audio above the browser. Step 2. Select Music, Sound Effects, or GarageBand, in the sidebar. And the selected item contents will appear as a list in the browser. Step 3. Browser to find the clip you'd like to add to your project. Drag the clip to the background music well that is located below the timeline. Add the converted Spotify songs to your iTunes library firstly. Then open iMovie on your Mac and click 'Audio' button above the browser. In the sidebar, select 'iTunes' to load the specific Spotify track you want and add it to iMovie. Browse to find the video clip and add it to the project in iMovie. Now feel free to edit it with the BGM in iMovie as you like. 3. Add DRM-free Spotify Songs to iMovie on iOS Devices Alternatively, if you want to use Spotify tracks on iMovie app on your iPhone, iPad or iPod touch device, you can follow the quick steps below to do it. Step 1. Open iTunes on your PC computer and then click the "File" > "Add File to Library" (or "Add Folder to Library") to import DRM-free Spotify songs to your iTunes. Step 2. Open iMovie app on your iDevice. Tap the "Add Media" button to import the Spotify songs you want to add, and tap "Audio" option. Step 3. Tap "My Music" to find the songs that have been synced to your device from the computer in advance. Tap the item and then tap the "Add Audio" button to add the songs to your iMovie. To learn more details, please visit its source page: https://www.tuneskit.com/spotify-music-tips/spotify-music-to-imovie.html |
TunesKit BlogHere you can find some useful tips regarding DRM removal on iTunes movies, TV shows, audiobooks, etc. Archives
May 2021
Categories
All
M4V Converter
Remove DRM from rented and purchased iTunes movies, TV shows and convert M4V to DRM-free MP4
Audiobook Converter
Remove DRM from iTunes/Audible audiobooks by converting AA, AAX, M4B, M4A to MP3, AAC, WAV, FLAC, M4A
iBook Copy for Mac
Remove DRM from iBook ePub files on Apple iBooks store with meta info kept at 30x faster speed.
Apple Music Converter
Kill DRM from Apple Music offline M4P songs at 30X faster speed with original ID tags kept.
|
 RSS Feed
