
|
Are you a Spotify listener? Now Spotify has been open to Garmin devices. But you can do that only if you're a Spotify Premium subscriber. Fortunately, here we will introduce a method to play Spotify on Garmin watches even offline playback even though you don't subscribe to Spotify Premium. 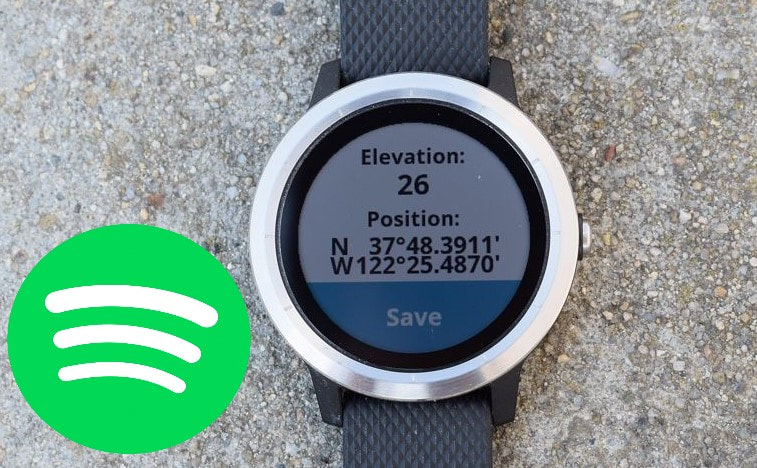 What you need?Except for getting a Spotify playlist with a Premium subscription, you could also use a third-party Spotify playlist downloader to extract music from Spotify. Spotify Converter is a professional streaming music downloader for all Spotify users to download Spotify to MP3, AAC, WAV, M4A, M4B, FLAC with lossless audio quality and full ID3 tags. You can also finish the conversion with a 5X faster speed and customize music files with bit rate and other parameters.  How to download Spotify music to Garmin Vivoactive 3 without a premiumNow just follow the guide below to convert Spotify music to Garmin watch with only 3 steps. 1 Import Spotify playlist to Spotify converter Open Spotify Music Converter and it will automatically load the Spotify app. Then you need to log into your Spotify account. Go to your music library on Spotify. Next, drag and drop your desired Spotify music tracks or playlists to the interface. Or copy and paste the link of the Spotify music or playlist. 2 Edit the output audio parameters Now we are going to go to set the output audio parameters for Spotify music tracks. There are six common audio formats like MP3, AAC, WAV, FLAC, M4A, and M4B for you to choose from. Except for adjusting the audio format, you could adjust the bit rate, sample rate, audio channel. 3 Download music from Spotify Once you've done all of the settings, you could click the "Convert" button to begin to download offline Spotify music tracks or playlists to your computer with Spotify to MP3 Converter. Wait for a while and it will move Spotify music tracks to your computer. Finally, you can upload the downloaded Spotify music files to your smartwatches and get smartwatches Spotify offline. 4 How to get Spotify on Garmin Vivoactive 3 Music watch After the conversion, it is time to add Spotify music to your Garmin Vivoactive 3 Music for playing. Connect your Garmin Vivoactive 3 Music to the computer by using an included USB cable. On your computer, open the Garmin Express app. Then select the "Music" section. In the "My Music" or "iTunes Library" list, select an audio files category like songs or playlists. Select the checkboxes for the audio files, and select the "Send to Device" button. Now you could listen to Spotify on Garmin Vivoactive 3 Music when you're in a place with a poor network without a Spotify premium plan. In addition, you could also use these converted Spotify music files to other places or devices as you like without any limits. ConclusionWith the assistance of Spotify Music Converter, you never need to subscribe to Spotify. You can just download songs you like with Spotify Music Converter and play them at any device.
For more information: https://www.viwizard.com/spotify-music-tips/play-spotify-music-on-garmin-vivoactive-3-music.html
0 Comments
When you are listening to Audible audiobooks, splitting audiobooks by chapters will make it easier to find where to continue next time. You use apply for this tool to help you split chapter and convert to MP3 for Audible books easily.  The Best Way to Split Audible AudiobooksAudible already offered the option for users to download chapters one by one officially. This is really time-consuming and they are only playable on the Audible app. It is OK if you have only a few Audible audiobooks, but it won't work if you have a number of Audible audiobooks and chapters. Another better option is to use a special audiobook splitter tool to help you split all the audiobooks into chapters within a few clicks. Please note a common audiobook splitter may not work since the Audible audiobooks are encoded in AA or AAX formats. So here I will recommend the best audiobook splitter TunesKit Audible Audiobook Converter which supports splitting Audible audiobooks into chapters effortlessly. It runs on both Windows and Mac computers. Please simply download the right version you want to your computer to evaluate it.  Tutorials to Split Audible Files into ChaptersTunesKit Audible AA/AAX Converter supports the bulk converting technology. The processes to convert Audible files and cut Audible files to pieces are done simultaneously with 100X faster speed. Even if you have numerous files, they can be finished within a few minutes. 1. Import Audible Audiobooks You have to download the entire audiobooks first. On Windows computers, you can install the Audible Download Manager to help you download the Audible files. On Mac computers, you can download them into iTunes directly. After downloading, you can locate the Audible files AAX or AA from the Windows Explorer or Mac Finder and drag them to TunesKit Audible AAX Converter. 2. Split Audible Files by Chapters TunesKit Audible Audiobook Converter offers many options for you to customize your Audible audiobooks such as splitting audible books, changing the output format, adjusting the playback parameters. To split the Audible AAX or AA files, you can click the editing icon which looks like a pen, then you will open the settings window where you can select the option to split files by time or chapter as you want. Besides, TunesKit Audible AA/AAX Converter can convert Audible AA/AAX to M4A, MP3, AAC, WMA, FLAC, WAV, etc. In addition, you can change the playback speed, volume, pitch. 3. Convert the Audible Audiobooks Finally, you can click the Convert button. It takes a few minutes only to convert couples of audiobook files effectively. ConclusionIn addition to splitting Audible audiobooks chapters, the more useful function of TunesKit Audible AA/AAX Converter is to convert AA/AAX to MP3 to completely offer you the freedom to deal with the audiobooks you have paid for.
More details: https://www.viwizard.com/audiobook-tips/split-audible-audiobooks-by-chapters.html If you listen to a song accidentally played by others, you can use an app to look for this song. Shazam is such a song-recognizing app. Currently, you can connect Shazam to Spotify and Apple Music. However, there are some problems happening when users connecting Shazam to Apple Music. This brings much trouble to Apple Music users. Luckily, we find a method to fix this problem and also an alternative way to add Shazam to Apple Music.  Can I Connect Shazam to Apple Music?Make sure you have both Apple Music and Shazam app installed on your phone. But this feature requires the Apple Music subscription to play Shazam songs, or else you'll see an error pops up on your screen. Let's get started. 1. Open the Shazam app, tap Library > Settings. 2. You can see the Apple Music bar on the Streaming section, tap CONNECT and follow the instruction it provides. 3. Go to open the Shazam app and recognize a song, you'll see an option to play or add to the Apple Music playlist. Apple Music Shazam Playlist Not Updating?After you connect Shazam to Apple Music, a new playlist named My Shazam Tracks will be added to your Apple Music playlist list. Now, if you recognize a song on Shazam, the song will be added to this Apple Music playlist simultaneously. But some users might run into troubles when they are recognizing songs, as this iPhone user reports: I have a paid Apple Music user. For some reason, my Shazams are no longer updating in this My Shazam playlist. I currently have 410 songs in My Shazam playlist. I noticed that there were only about half of that in the playlist on Apple Music. To fix this problem, here are some solutions : 1. Disconnect your Apple Music from Shazam, and delete the Shazam playlist on your Apple Music app. And then reconnect Apple Music with Shazam. 2. Installed the latest version of both the Shazam and Apple Music. This is to make sure the full feature is available on both apps. 3. Check your internet connection, because poor Wi-Fi or cellular may cause this problem. If you still can't fix the problem after trying all the solutions listed above, you can check what I'm going to introduce in the next part, which will definitely make your Shazam songs worth it. Download Shazam Music on Apple Music with Free AccountNormally Apple Music users need to have the Apple Music paid subscription to play and download songs, but there's a trick for you to download Shazam songs on Apple Music for free even if you haven't subscribed to Apple Music yet. If you still want to keep Apple Music songs after your subscription ends, you can use the TunesKit Apple Music Converter to download all your Apple Music Shazam songs to your computer. After that, you still can listen to these Apple Music songs even if your subscription is expired. TunesKit Apple Music Converter is designed to convert any iTunes, Apple Music to MP3, AAC, FLAC, and other common formats. The specially designed converter can speed up the conversion to 30X faster with high output quality preserved so that you are able to download Apple Music Shazam songs and play them anywhere you want. 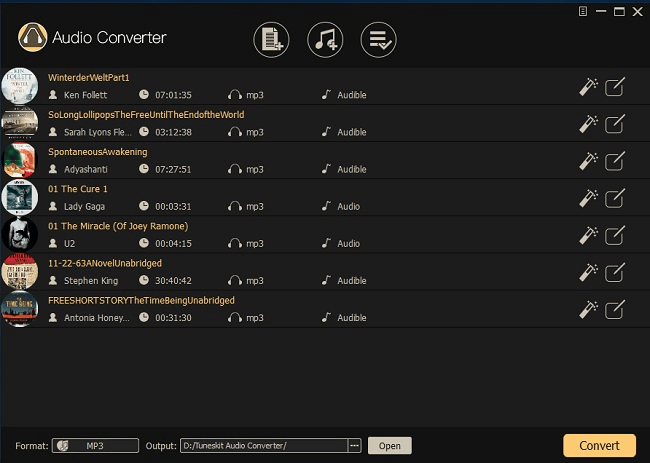 1. Launch your TunesKit Audio Converter and then click the "Add Files" button to import songs from the iTunes library. 2. Once completed loading input files, you can click the "Format" button and choose the output format among MP3, AAC, FLAC, WAV, and M4B. You can also click the "Output" button and choose the output location. 3. With the last set done, press the "Convert" button and TunesKit will start the conversion process. You can find all your converted songs by clicking the "Converted" button. 4. Now all your Shazam tracks on Apple Music are available for you forever without the Apple Music subscription. You can play them in your car, share them with your friends and do whatever you want. ConclusionHere are the 2 solutions for you to Connect Shazam to Apple Music. If you feel this tutorial is helpful, do not forget to share it with your friends!
For more: https://www.viwizard.com/apple-music-tips/add-shazam-to-apple-music.html GarageBand is a digital audio workstation launched by Apple. This is workable on both Mac and iOS devices. A great many iOS users choose it to make music. Unfortunately, GarageBand does not support Apple Music as a music source. But we have found a solution to transfer and use Apple Music on GarageBand. Check it out in this post. See also: How to Add Spotify Music to GarageBand  Part 1 - How to Import Apple Music to GarageBandApple Music songs are protected in M4P format but GarageBand only supports AIFF, WAV, CAF, AAC, Apple Lossless, and MP3. How to convert Apple Music songs to formats that are supported by GarageBand? We have TunesKit Apple Audio Converter to help you. TunesKit can convert Apple Music/iTunes songs to MP3, AAC, WAV, and other formats. More also, it works at a 30X faster speed and you will spend less time on the conversion. Below we will show you how to convert Apple Music to GarageBand with this Apple Music to MP3 converter.  Step 1. Add Apple Music Songs to TunesKit First, download TunesKit Audio Converter and confirm that Apple Music works well and Apple Music songs you want to convert play well on your computer. Otherwise, you should authorize to play those Apple Music songs in advance. Launch the TunesKit Audio Converter and Apple Music both. You can use the Load iTunes Library button to import Apple Music songs to the converter or directly drag files from the Apple Music folder to the TunesKit. Step 2. Adjust Output Settings Open the Format panel of TunesKit to select an output format for your audio files. GarageBand supports file types MP3, WAV, AAC, CAF, and AIFF. So, you can choose MP3, WAV, or AAC as the output format of your Apple Music songs. Step 3. How to Convert Apple Music to MP3 You can take up the conversion by clicking the Convert button. Wait for a few minutes until the conversion finishes. If you don't remember which folder you choose to save the converted songs, you can go to the Converted History and use it to find them. Part 2 - How to Upload a Song to GarageBandNow all the converted songs are saved to the local folder of your computer. You can add them to GarageBand and use them to mix music in GarageBand. GarageBand has a desktop application for Mac and a mobile app for iOS. Here we will introduce both ways to import Apple Music to GarageBand on iPhone/iPad and Mac for you. Import Apple Music to GarageBand on Mac Here are the 3 steps to add Apple Music to GarageBand desktop and to use Apple Music on GarageBand with a Mac computer. 1. Launch GarageBand on Mac, and you will see the main interface. 2. Click the Media Browser button on the top-right corner. GarageBand will scan and show you the sources from iTunes or local files on your PC. 3. Click the Local Computer Folder option and then import the converted Apple Music songs to GarageBand. Put Apple Music to GarageBand on iPhone/iPad The GarageBand mobile app is for iPhone and iPad. To transfer Apple Music to GarageBand on iPhone or iPad, you need to turn to Files app for help. Before we start to learn how to add songs from Apple Music to GarageBand, transfer Apple Music songs to Files app first. 1. To import the entire song, just set the length of the song section to Automatic. Tap the Tracks View button to get a list of tracks. 2. Choose the Loop Browser button at the control bar. Then opt for the Files app on iPhone or iPad. Tap the Browse items from the Files app button to locate the Apple Music audios you want to add to GarageBand. By taping it in the list, you can preview these audios. Conclusion To play Apple Music on GarageBand, the only method is to convert Apple Music to common audio. And use the different methods we introduced above to import the Apple Music songs to GarageBand on Mac or iPhone/iPad.
For more: https://www.tuneskit.com/apple-music-tips/add-apple-music-to-garageband.html Most people will choose Spotify mini player when they are doing other things. How to use Spotify mini player on Windows and Mac? This post contains everything you need to know about Spotify mini player. 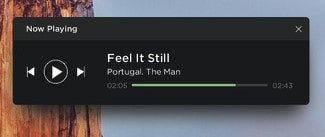 How to Use Spotify Mini Player on Windows 10The official Spotify desktop app doesn’t have a mini player, but you can get it on your computer in several ways, like on Chrome. Chrome can be a great Spotify music player. Spotify provides a web player for both free and premium users to access Spotify music which is much easier than using the desktop app. And you can also get a Spotify mini player on the web player. 1. Open Chrome on the computer and search for open.spotify.com to get a Spotify web player. 2. Sign in to your Spotify account and play a song, then click on the mini player icon to open Spotify mini player. 3. A small window will pop up, with which you can play, pause or skip through songs using this mini player. How to Get Spotify Mini Player on MacAlfred Spotify Mini Player is a useful tool that can control almost everything you can do on the Spotify app. To get started, you’ll have to download the workflow and then set it up. It might be a little tricky for most people, but if you’re patient enough to insist on it, you can explore many things out of this tool. Best Alternative to Spotify Mini PlayerThe methods mentioned above are all eligible to get a Spotify mini player, but they also have different shortcomings. Spotify mini player on Chrome can only stream songs in 192kbps and your local files cannot be played on web player as well. Third-party Spotify mini players all require a Premium account to get an unlimited song skipping feature, or else there’ll be many ads pop up all the time in the middle of the song. But there’s a workaround to play Spotify songs without a Premium subscription and with the same feature as a mini player. With TunesKit Spotify MP3 Downloader or Windows, you can download Spotify songs to MP3 or other popular formats. You can put these songs in a media player on your computer and use the mini player feature of this media player to play Spotify songs without Premium. TunesKit Spotify Music Converter can convert Spotify audio files into 6 popular formats such as MP3, AAC, M4A, M4B, WAV, and FLAC. This tool can run at up to 5X faster speed to convert Spotify songs. Almost 100% of the original song quality will be kept after converting process by using this converter. All the converted songs can be played on any media player on your computer like Windows Media Player, VLC, and so on.  Play Spotify Songs on Mini PlayerAfter you convert the Spotify songs you like with TunesKit, you are able to use a media player to help you use a mini player for your Spotify songs. Here are some examples. Windows: Open Groove Music and play a song downloaded from Spotify. Then click on the "Play in mini view" button to open the mini player to play Spotify songs. Mac: You can play Spotify songs on iTunes. 1. Open iTunes on Mac and load the Spotify songs. 2. Play the Spotify song and then click on the mini player button. 1. Launch TunesKit and Import Songs Open TunesKit software and Spotify will be opened by this software. Then drag and drop tracks from Spotify into the TunesKit. 2. Set Up Output Parameters After adding Spotify music tracks to TunesKit, you can choose the output audio format for your audios. There are six options including MP3, M4A, M4B, AAC, WAV, and FLAC. 3. Start the Conversion Once all the setting is finished, click the "Convert" button. You could browse the converted songs by clicking the "Converted" button. Conclusionere are 2 methods to use Spotify mini player. We also provide an alternative for Spotify mini player. In fact, with TunesKit Spotify downloader, you can even download Spotify songs without Premium.
For more: https://www.tuneskit.com/spotify-music-tips/get-spotify-mini-player.html  Google Drive is a wonderful tool to backup, save or transfer files. Many people use it to back up Spotify music, Apple Music, audiobook, other files also. When I tried to back up Apple Music on Google Drive, I failed to do so. What is the reason for it? How to solve this problem? Here I will introduce how to upload Apple Music to Google Drive. Best Tool to Convert Apple Music FilesBefore adding the Apple Music songs to your Google Drive, the most important thing you need to know is that Apple Music is protected by Apple to control what you do with the streaming music content. Because of the protection, you are limited to play the Apple Music online music or offline tracks on devices related to your Apple account only. You can't upload the Apple Music songs to Google Drive or other devices. And once you cancel the subscription to Apple Music, the downloaded streams will become unusable automatically. If you want to get rid of the Apple Music songs protection, then you'll need the help of a third-party tool to help you convert Apple Music M4P songs. Go ahead to find the answer. TunesKit Apple Music Converter is an all-in-one Apple Music M4P converter to help Apple Music subscribers convert the Apple Music or iTunes M4P songs to MP3, AAC, M4A, WAV, FLAC, M4B formats with ID tags and original quality preserved. With the assistance of TunesKit Apple Music Converter, you'll be able to get the unprotected Apple Music songs so as to back them up to Google Drive for as long time as you like. 4 Steps to Backup Apple Music to Google DriveNow follow the steps here to convert your Apple Music to MP3 with TunesKit Apple Music to MP3 Converter, so that you can enjoy the Apple Music MP3 files on Google Drive as you like. Step 1. Load Apple Music Tracks Launch TunesKit Apple Music to MP3 Converter. Then you can add the downloaded M4P offline files by either clicking the "Add Files" button or dragging the files from where you store those files on your computer to this software. It supports batch conversion so that you can import multiple music tracks to TunesKit once. Step 2. Select Output Format Once the songs are added successfully to the software, you can choose the output format as you like by clicking the Format button, such as MP3, AAC, WAV, FLAC, M4A, and M4B. Step 3. Convert Apple Music to Google Drive When everything is ready, you can click the "Convert" button to start converting the Apple Music to other common formats. Step 4. Upload converted Apple Music to Google Drive Sign in to Google Drive with your Google account. Then you can add the converted Apple Music files to your Google Drive in two ways. You can simply drag the files or folder over the top of the Google Drive window. Or click on "New" in the top left corner, and then select either "File Upload" or "Folder Upload". ConclusionTo back up your Apple Music to Google Drive or other cloud or even on your computer, it is necessary to convert Apple Music to common audios, or they will be deleted by Apple when you cancel the subscription. And your backup will be meaningless.
For more: https://www.tuneskit.com/apple-music-tips/transfer-apple-music-to-google-drive.html Although Spotify provides a free version for users, the free version is added loads of restrictions. One of the most aggravating is the ads. What if we want to keep using Spotify for free getting rid of ads. Here are the best 3 methods to block Spotify ads.  Method 1. Block Ads on Spotify with Spotify PremiumThe most popular way to remove ads on Spotify is to upgrade to the Spotify Premium version, which will require a $9.99 monthly subscription fee, and you will get a half price if you are a college student. After subscribing to Spotify Premium, you'll be able to listen to any Spotify track, album and playlist without ads in 320kbps high quality. You can download Spotify music offline on any device. See also: How to Get Spotify Premium Free Trial 6 Months Step 1. Go to the homepage of Spotify. Find the "Get Spotify Premium" option and click it. Step 2. Spotify offers a 1-month trial plan for you to try the service before you decide to keep using the Spotify premium subscription. Choose your payment method and enter the related info and details as requires. Step 3. Click the "Start My Spotify Premium" button to complete the subscription. Note: You can cancel the premium membership at any time during the 3-month trial. If you don't cancel before the trial ends, you will be charged $9.99 + applicable tax by Spotify. Thus, if you do not want to pay for Spotify, do remember to unsubscribe to it. 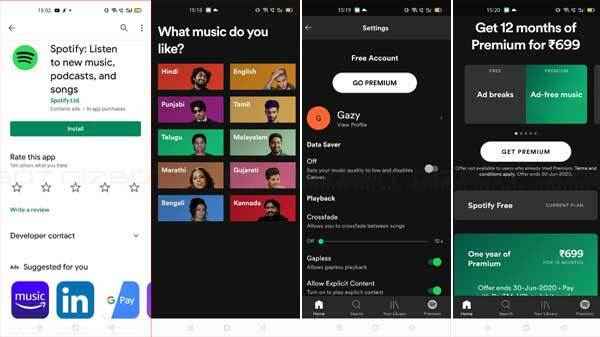 Method 2. Download Spotify Songs with Spotify Ad BlockerThanks to the fast growth of some Spotify music downloading services, blocking ads in Spotify has become possible and easy without a Spotify premium account. In other words, with these powerful Spotify downloaders, you'll be able to download ad-free Spotify music offline with a free account. TunesKit Spotify Music Converter is such a smart ad blocker for Spotify that can remove the ads from Spotify songs while downloading Spotify music to MP3. It works for both free and premium users and only needs a few clicks to download any Spotify track, album or playlist offline. Besides, while removing ads, it also keeps the original sound quality and ID3 tags of the original tracks, up to 320kbps. Tutorial: How to Get Spotify Ad-Free with TunesKit Spotify Playlist DownloaderStep 1. Download and install TunesKit Spotify Music Converter on your computer (Mac or Windows). Download the most up-to-date Spotify app as well. Step 2. Open the Spotify downloader and it will launch Spotify app simultaneously. After that, browse the Spotify account and drag any track/album/playlist to TunesKit interface. Step 3. Click the "Preferences" button from the menu bar and select the output format as MP3 or other formats. Make changes to the bit rate, sample rate, audio channel if you have need. Step 4. Click the "Convert" button and wait for a while till the process completes. Then you'll be able to enjoy the ad-free Spotify songs offline on any MP3 player or other device. 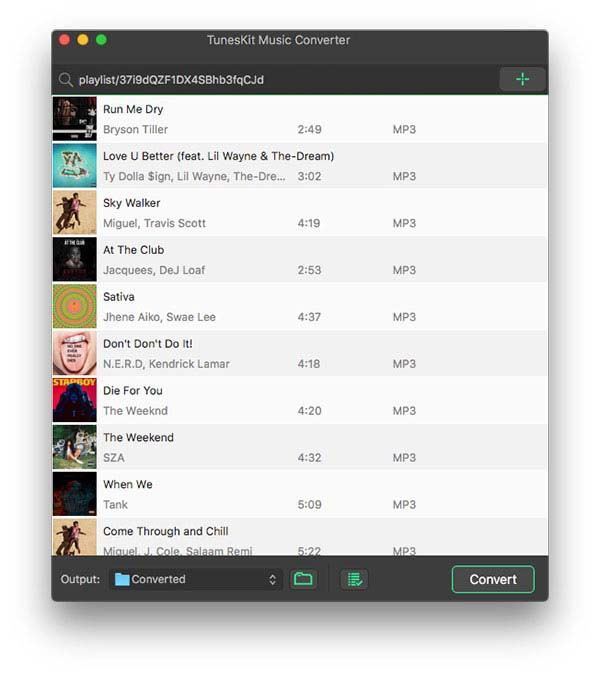 Method 3. Block Ads in Spotify by Modifying Host FileAnother popular way to block ads for Spotify is by revising the host file on your Windows or Mac. But the files will change from to time. So you need to keep updating them. Therefore, this method is more difficult to perform and only suits those who know tech. Step 1. If you are using a Windows computer, go to C:\Windows\System32\drivers\etc\hosts. For Mac users, you should just open the host file in Terminal by typing vim /etc/hosts or sudo nano /etc/hosts. Step 2. Open the host file and paste this list at the bottom of the file. Save the edited file. Step 3. Launch Spotify and start playing the track or playlist without ads. See Also: How to Remove Ads from Spotif SummaryThe most common method is to subscribe to Spotify. But that will definitely cost a lot of money. If you are tech-savvy, then try to modify the host file. But this method is too complicated. The method that is easy and low-priced is to use a Spotify downloader to download any Spotify audio to listen to without any ads.
For more: https://www.tuneskit.com/spotify-music-tips/block-ads-on-spotify.html Apple Music boasts of its track library of 75 million tracks. If you use Serato DJ, Apple Music must be a good music source. But if you try to upload Apple Music tracks to Serato DJ, you will find that you cannot transfer Apple Music tracks to Serato DJ however you try. Luckily, now you are able to do that with the latest method in this post! See also: How to add Spotify music to Serato DJ software 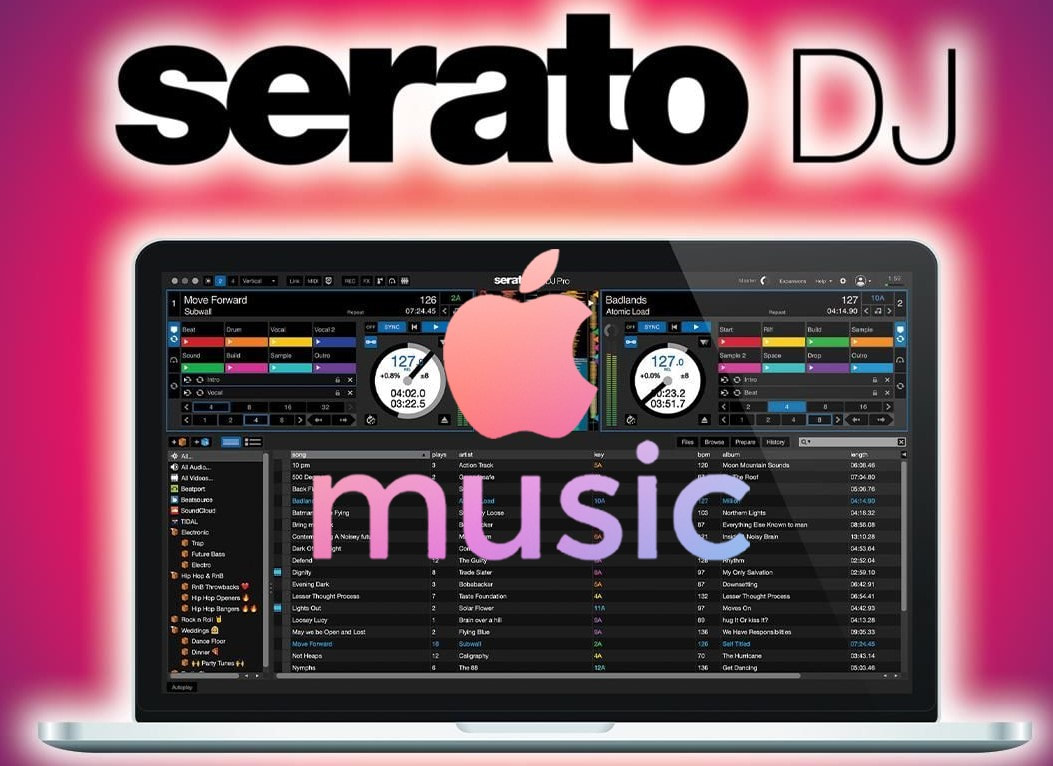 Solution 1: Synchronize Apple Music to TIDALAlthough Serato DJ doesn't support Apple Music, it supports TIDAL and SoundCloud. So, in this section, we will introduce a solution to sync your Apple Music playlists to TIDAL. To do that, you need a TIDAL subscription. Please note that you should also update your Serato DJ to the latest version, whether it is Serato DJ Pro or Serato DJ Lite. Now, the key to this method is a music transferring service called Soundiiz, which serves as a middleman between all of the current streaming services, including Apple Music, Spotify, TIDAL, Deezer, and, SoundCloud. Soundiiz can transfer all the playlists that you currently have in those services over to TIDAL. After you sign up to Soundiiz, just use it to transfer your playlists to TIDAL, you can then access them within Serato DJ and spin with those tracks.  Solution 2: Convert Apple Music to MP3 with Apple Music ConverterThis solution is to convert Apple Music songs, which are in protected M4P format, to MP3 format so that you can directly import Apple Music to Serato DJ. Here you will need TunesKit Apple Audio Converter. This is a powerful Apple Audio Converter that supports converting Apple Music, iTunes audiobooks, and Audible books. Step 1. Add Apple Music to the Apple Music Converter First, download TunesKit Apple Music to MP3 Converter and please guarantee that you've authorized your computer to stream Apple Music songs. Then launch TunesKit and from the main interface, you will find the Load iTunes Library button to add your Apple Music songs. Or directly drag files from the Apple Music media folder to the TunesKit. Step 2. Set Output Format When you finish step 1, open the Format panel to select an output format for Apple Music songs. Serato DJ Pro supports file types including MP3, OGG, ALAC,(Mac & Windows 10 only), FLAC, WAV, MP3, MP4, M4A, and AAC(Mac only). TunesKit allows you to convert any audio to MP3, AAC, M4A, M4B, WAV, and FLAC, which means that you can choose any one of them as your output format. We recommend MP3. Step 3. Convert Apple Music to MP3 Once you are done with all the settings and editing, you can press the "Convert" button. Wait for a few minutes until the conversion finishes, then you can locate the unprotected Apple Music files in the folder you've selected. If you don't remember which folder you choose, you can go to the Converted History to find them. Since you get the converted Apple Music tracks, you can import them to Serato DJ for remixing. Comparison of 2 MethodsHere you have known the 2 methods to transfer Apple Music to Serato DJ for remixing. Which one is better? With the first method, you will need to subscribe to Tidal and also another tool. But for most people, it is unnecessary to subscribe to more than 1 streaming music service. So, the better choice will be converting Apple Music to MP3.
For more: https://www.tuneskit.com/apple-music-tips/mix-apple-music-with-serato-dj.html Collaborative playlists are a special feature of Spotify, which is born in 2008. It enables you and your friend to edit the playlist even you are in two different countries. If you still do not know how to use Spotify collaborative playlist, just read this post carefully. 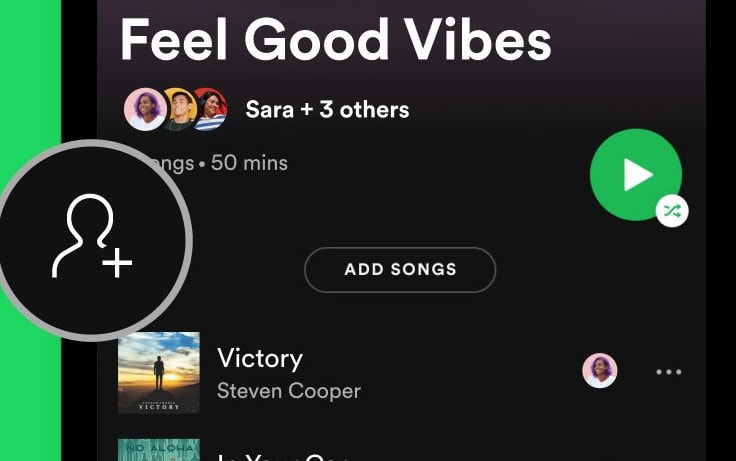 How to Make Collaborative Playlist on Spotify on Mobile/ComputerIt's pretty easy to make Collaborative playlists on Spotify. You can download it regardless of whether you are using Spotify desktop or Spotify for Android or Spotify for iOS. Just set any Spotify playlist to Collaborative and your friends will be able to add, delete, and record the tracks. To make Spotify Collaborative playlist, only follow these steps: How to Create a Collaborative Playlist on Spotify on Desktop Step 1. In the left panel, right-click a playlist you wish to open. Step 2. Select 'Collaborative Playlist'. Step 3. Right-click on the playlist again, then scroll down to 'Share'. Step 4. Choose 'Copy Playlist Link' then send it to your friends. How to Create Collaborative Playlists on Spotify on Mobile and Tablet Step 1. Tap 'Your Library' > 'Playlists' and select one you want to make Collaborative. Step 2. Tap in the top-right corner > 'Make Collaborative' Step 3. Choose the top-right corner again Step 4. Choose 'Copy Link', then distribute to your friends. Note: This Collaborative Playlists feature isn't available on mobile unless you have a Premium account. See also: Spotify Free VS Premium Download Spotify Songs for Offline Listening without PremiumIf you want to download and back up Spotify playlists for personal use, but you do not have a Spotify Premium account, you can try Spotify music downloader. Navigate to the TunesKit Spotify Music Converter (Mac or Windows), select the 'Download' option to install the Spotify converter. Let's go to download Spotify music for free with it. 1. Launch TunesKit Open the converter and TunesKit will automatically open the Spotify program. Then find your songs on Spotify and upload them into the downloading list of TunesKit by drag-and-drop. 2. Set the output audio parameters Go to 'Menu > Preference' to change the output format of your Spotify tracks as MP3 and you can continue to adjust the audio parameters such as the audio channel, bit rate, and sample rate according to your personal demand. 3. Convert Spotify playlist to MP3 Once you get all the settings done, click the Convert button to start the downloading and conversion of Spotify songs you upload to TunesKit Spotify MP3 Downloader. Wait for a while and TunesKit will save your required Spotify songs to your computer automatically. ConclusionFrom the tutorial above, you will know how to create Spotify collaborative playlists on mobile devices or computers. Also, you will know how to download Spotify playlists with Spotify Free - using TunesKit Spotify Music Converter.
For more: https://www.tuneskit.com/spotify-music-tips/collaborative-playlist-spotify.html Released in 2014, Amazon Echo has become one of the most popular smart speakers in the smart speaker market. We play music, audiobooks, or any kind of audio on Amazon Echo. And the virtual assistant who is named Alexa enables us to use voice orders to play or stop the playing of audio. For Apple Music users, it is hard to refuse to play Apple Music on Amazon Echo. So, let’s see the best 3 methods to listen to Apple Music on Echo.  1. Listen to Apple Music on Alexa with Apple Music SkillIf you have an Apple Music account, install the Apple Music skill in the Alexa app and link your account to listen to Apple Music on Echo. Once the Apple Music skill is installed onto your device, you can then ask Alexa to play any songs, playlists, and albums from Apple Music. For example, you can say, "Alexa, play Nice For What on Apple Music." The Echo dot speakers will start to play the song as required. Except for the $9.99 monthly subscription fee of Apple Music, there's no extra cost to stream Apple Music on Amazon Echo. But as for now, for Apple Music subscribers using Echo Show or Echo Spot, you can see album art only. 2. Upload Apple Music to Amazon to Play on EchoAnother solution to stream Apple Music to Amazon Echo is to upload the Apple Music songs to Amazon Music. After that, ask Alexa to play the music and you can also control playback with simple voice commands. This method is better since it works without using your phones or tablets anymore. The best part of this method is that it enables you to enjoy Apple Music on Alexa even if you cancel Apple Music subscription someday. In this case, you may doubt whether it's possible to transfer Apple Music to Amazon Music as they are protected in M4P. That's a problem until you have TunesKit Apple Music Converter. This tool will help you can completely convert Apple Music to MP3 for playing on any device and platform. Now you can download the free version of this smart software and follow the steps to upload Apple Music to Amazon Echo without using a mobile device. Part 1. Convert Apple Music M4P to MP3First, you need to convert Apple Music to MP3 or other common formats. In the next part, you can then upload the converted Apple Music to Amazon easily.
Step 1. Add Apple Music to Apple Music to MP3 Converter Open TunesKit Apple Music Converter on your computer and add the downloaded tracks from the Apple Music library by dragging the songs from the folder where they are saved from the computer hard drive to the TunesKit window. Step 2. Start to convert Apple Music to MP3 Choose the Format button and select the output format such as MP3, AAC, WAV, FLAC, M4A, and M4B according to your needs. Then you can begin to convert your Apple Music songs from M4P to formats by clicking the Convert button. Once converted, click the Converted button to locate the well converted Apple Music files. Part 2. Upload Apple Music Files to Amazon MusicThen go to upload Apple Music to Amazon, you can follow the steps below. Step 1. In order to upload Apple Music to Amazon, you need to install the Amazon Music app. Step 2. Once installed, open the Amazon Music app, then drag and drop the converted Apple Music songs from the computer to the Upload selection under Actions. Step 3. select Songs, and choose the Offline filter. Click the Upload icon next to the music you want to upload. You can see THE uploaded music, and music that's uploading by clicking the Uploaded filter. Once the Apple Music songs are imported to Amazon Music app, you can play them on Echo with simple voice command. Method 3. Stream Apple Music on Echo via BluetoothBecause Amazon Echo works with Bluetooth, you can stream Apple Music songs to Echo from your phone or tablet. Here we'll show you the complete guide to connect Amazon Echo to Apple Music by pairing a mobile device with an Echo speaker through Bluetooth. Preparations Set your phone or tablet to Bluetooth pairing mode. Make sure it is in range of your Echo for better connection. Step 1. Activate Bluetooth Pairing on Amazon EchoTurn on Echo and say, "Pair" to it. If you want to exit the pairing mode, just say, "Cancel." Step 2. Connect Mobile Device with EchoOn your mobile device, open the Bluetooth settings menu, and select your Echo. Alexa will tell you if the connection is successful. Step 3. Listen to Apple Music on EchoOnce connected, you should access Apple Music songs on your mobile devices and start playing Apple Music. To disconnect your phone or tablet from Echo, just say, "Disconnect." SummaryHere are the best 3 methods to play Apple Music on Echo. The first and third ones need you to use a phone or tablet to assist. If you do not want to use your phone, use TunesKit to convert Apple Music to Echo. For more: https://www.tuneskit.com/apple-music-tips/apple-music-to-amazon-echo.html |
TunesKit BlogHere you can find some useful tips regarding DRM removal on iTunes movies, TV shows, audiobooks, etc. Archives
May 2021
Categories
All
M4V Converter
Remove DRM from rented and purchased iTunes movies, TV shows and convert M4V to DRM-free MP4
Audiobook Converter
Remove DRM from iTunes/Audible audiobooks by converting AA, AAX, M4B, M4A to MP3, AAC, WAV, FLAC, M4A
iBook Copy for Mac
Remove DRM from iBook ePub files on Apple iBooks store with meta info kept at 30x faster speed.
Apple Music Converter
Kill DRM from Apple Music offline M4P songs at 30X faster speed with original ID tags kept.
|
 RSS Feed
